Deploying Highly Available Data Backend clusters in Amazon EC2 can be as simple as booting up 3 VM instances from NodeFabric AMI and enabling included MariaDB-Galera and Ceph data storage services.
Updated: Oct 3, 2015 (for NodeFabric 0.4.2 release)
http://nodefabric.readthedocs.org
Part I: NodeFabric Introduction
Part II: NodeFabric Architecture
Deploying NodeFabric in AWS
Tasks outline:
- Step 1: Sign-up for Hashicorp’s ATLAS user account and generate access token
- Step 2: Launch 3 NodeFabric VM instances and join the cluster
- Step 3: Login to NodeFabric cluster node(s) and run nodefabric-dashboard for status info
- Step 4: Bootstrap MariaDB-Galera database cluster
- Step 5: Bootstrap Ceph distributed storage cluster and CephFS
Current NodeFabric requirements and limitations:
- Supported NodeFabric cluster size is fixed to 3 nodes / VM instances - variable cluster sizes will be supported later;
- NodeFabric VM instances need to be provisioned with AWS VPC network - not with EC2 Classic - in order to preserve internal IP addresses across VM instance reboots. Default AWS provided VPC subnets are ok - so creating your own custom VPC subnet is not required;
- AWS NodeFabric cluster auto-bootstrap feature requires valid Hashicorp ATLAS service account and ATLAS access token;
- If planning to use Ceph distributed storage module - then at least one additional block device per each VM instance / cluster node is required - with suggested minimum size of 64GB;
Step 1: Sign-up for ATLAS user account and generate access token
Goto https://atlas.hashicorp.com/ - and sign-up for your free user account. For creating ATLAS access token please login and click on your username on upper right corner. Pick “Tokens” from the menu on the left and generate new access token there.
NB! Don’t forget to copy your freshly generated token and store it somewhere - as its going to be shown only once there!

Step 2: Launching NodeFabric cluster AWS instances
NodeFabric is available directly from AWS Marketplace:
https://aws.amazon.com/marketplace/pp/B015WKQZOM
AMI details:
 | Region                    | AMI ID       |
 |---------------------------|--------------|
 | US East (N. Virginia)     | ami-1daaf778 |
 | US West (Oregon)          | ami-1045a623 |
 | US West (N. California)   | ami-ddce0d99 |
 | EU (Frankfurt)            | ami-9cd0dc81 |
 | EU (Ireland)              | ami-79635c0e |
 | Asia Pacific (Singapore)  | ami-8cdccfde |
 | Asia Pacific (Sydney)     | ami-b1afe58b |
 | Asia Pacific (Tokyo)      | ami-f0315cf0 |
 | South America (Sao Paulo) | ami-5112834c |
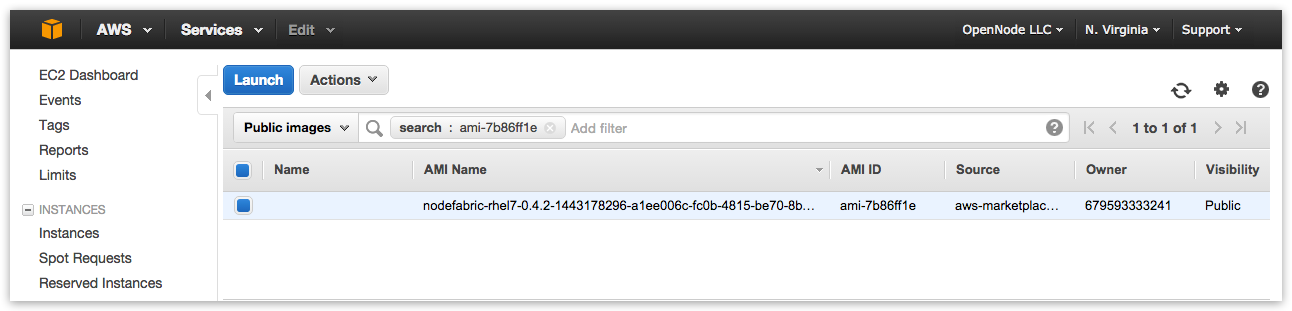
Locate and select NodeFabric AMI
Search for suitable NodeFabric AMI ID under EC2→AMIs and launch 3 instances from it:
Choose Instance Type
NodeFabric minimal instance flavor/type can be: t2.micro
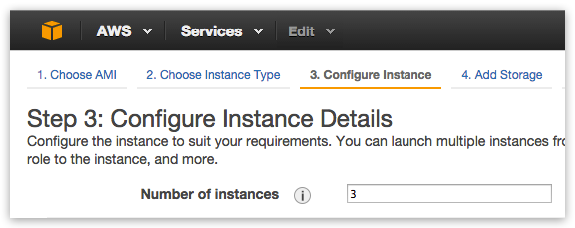
Configure Instance Details
You must launch 3 NodeFabric instances due clustering requirements - so please set “Number of instances” to 3:
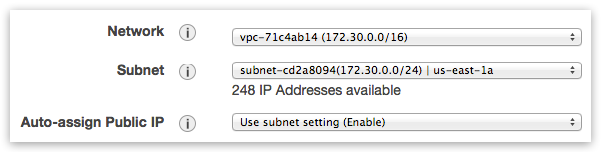
Choose default VPC network/subnet and enable public IP assignment:
Provide your ATLAS_TOKEN and ATLAS_ENVNAME under “Advanced Details -> User data” (required for zero-configuration Boot-and-Go operation):
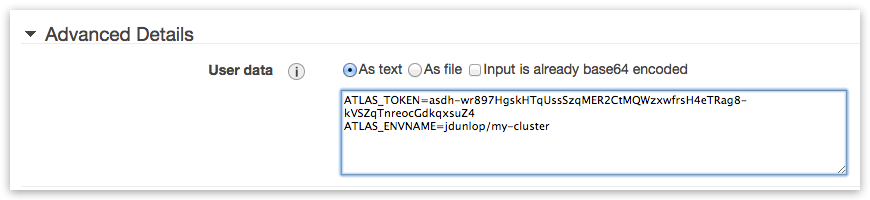
ATLAS_ENVNAME parameter in user-data has the following format: <your_atlas_username>/<deployment_name> - where <deployment name> can be arbitrary desired cluster name – it will be presented in ATLAS environment list once cluster nodes bootup and connect.
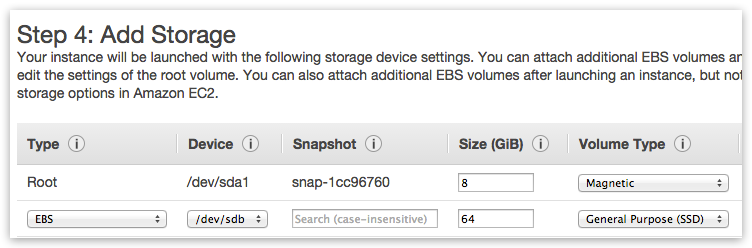
Add Ceph disks
If planning to use Ceph distributed storage (and CephFS) - then one additional block device per each VM instance is required – with suggested minimal size of 64GB:
Assign Security Group
Currently for demo deployment purposes its easier to set Security Group rules to “Allow ALL” for now:

Select ssh keypair and launch instances
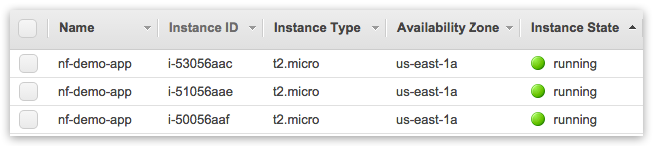
Goto “Instances” and wait until 3 cluster nodes will reach to “running” status:
Step 3: Connecting to NodeFabric cluster and monitoring it’s status
NB! Instances ssh login username is: centos
Lookup arbitrary cluster node public IP to connect to:
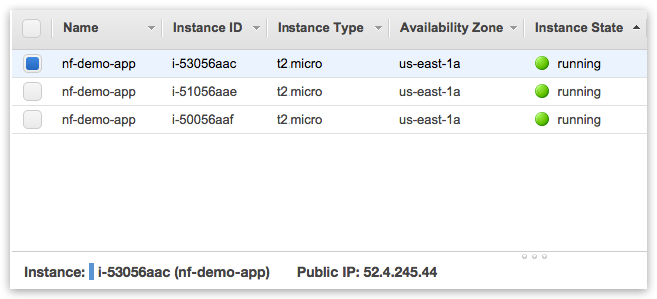
Connect to arbitrary cluster node as:
ssh -i .ssh/your_aws_private_key.pem centos@node_public_ip
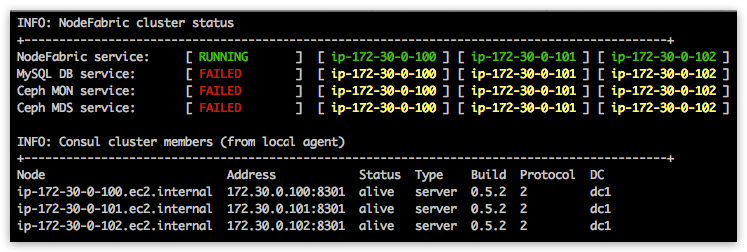
Run nodefabric-dashboard for cluster status info:
[centos@ip-172-30-0-100 ~]$ sudo nodefabric-dashboard
You should see that NodeFabric cluster nodes are up and running (by default MariaDB and Ceph services are not yet enabled at this point):
Consul eventlog can be observed on each cluster node by running nodefabric-monitor:
[centos@ip-172-30-0-100 ~]$ sudo nodefabric-monitor
Step 4: Bootstrapping MariaDB-Galera database cluster
MariaDB-Galera database cluster is packaged and delivered as nf-galera docker containers - which are already preloaded onto NodeFabric hosts. nf-galera service management commands are provided by nf-galera-ctl utility:
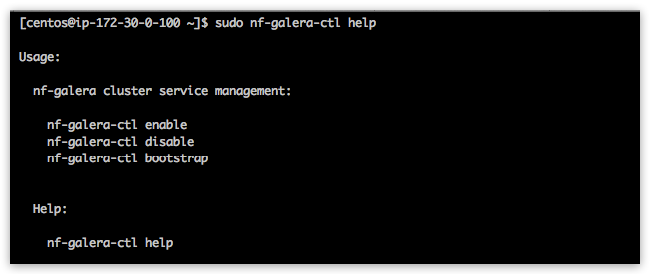
Enable and start nf-galera containers across ALL cluster nodes (this command is broadcasted!):
[centos@ip-172-30-0-100 ~]$ sudo nf-galera-ctl enable
Observe MySQL DB service node statuses from nodefabric-dashboard. All nodes statuses should turn red - which indicates that container is up but service is not passing health-checks - ie failing ( yellow status => container down). MySQL DB (global) service should say “FAILED” - as it is not yet bootstrapped:

Bootstrap nf-galera service
[centos@ip-172-30-0-100 ~]$ sudo nf-galera-ctl bootstrap
DB cluster bootstrap and initial dataset creation might take up to 1-2 minutes. DB node statuses from nodefabric-dashboard should turn to green - and DB service status should say “RUNNING”. Once succesfully bootstrapped - default MySQL root user password is empty and access is limited to localhost.

You can connect to database locally as root user (with empty password):
mysql -u root
For debugging purposes nf-galera-monitor command can be used:
[centos@ip-172-30-0-100 ~]$ sudo nf-galera-monitor
Bootstrapping Ceph
Ceph in NodeFabric has two service containers: nf-ceph-mon (Monitor) and nf-ceph-mds (Metadata). OSDs (Object Storage Daemons) are run in host context - where additional block devices for Ceph storage should be provided. Ceph Monitors cluster must be up and running - before any OSDs can join. Once 3 OSDs are ready - Metadata servers can join and CephFS distributed filesystem can be bootstrapped and mounted. nf-ceph-ctl management tool is used to enable and bootstrap Ceph Monitors cluster:
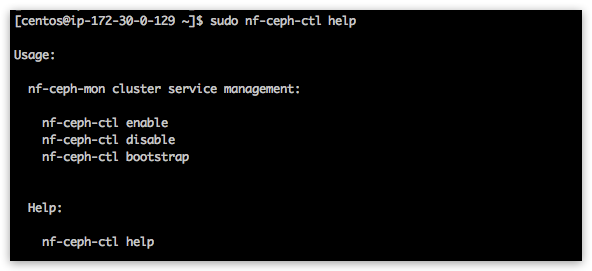
Enable and start nf-ceph-mon containers
[centos@ip-172-30-0-100 ~]$ sudo nf-ceph-ctl enable
This command will enable and start nf-ceph-mon systemd services across ALL hosts - as this command will broadcast itself across cluster - so it only needs to be executed once on a single node!. Ceph MON service node statuses should get red on nodefabric-dashboard - indicating that MON containers are running but service is not yet passing health checks (as its not bootstrapped yet!):

Bootstrap Ceph cluster monitor service
[centos@ip-172-30-0-100 ~]$ sudo nf-ceph-ctl bootstrap
This command is broadcasted across cluster - so you need to execute it only once on single node! Ceph bootstrap process generates and distributes initial Ceph cluster configuration and keys. Ceph MON service node statuses on dashboard should be reaching gradually into green (expected bootstrap time should be less than a minute). Ceph MON service should reach into “RUNNING” state.

Provide and initialize Ceph storage
Dedicated block devices should be provided for Ceph data storage. Each block device will be having its own dedicated OSD service attached to it. One Ceph blkdev/OSD is required per host and running multiple devices/OSDs on single NodeFabric host is also supported.
NB! Ceph OSDs have to be initialized on EACH node! nf-ceph-disk commands do NOT broadcast across cluster! Initialization procedure wipes given block devices from previous data and creates required data structures and activates OSD systemd service. nf-ceph-disk utility is provided for block device / OSD management related tasks:
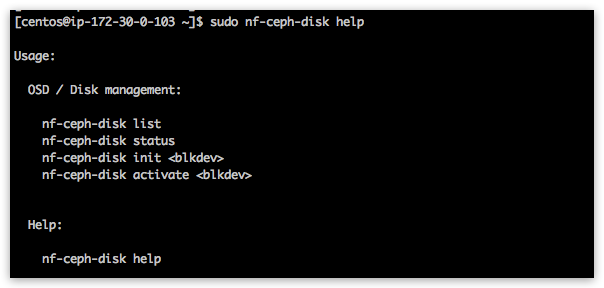
Listing available block devices in the system:
[centos@ip-172-30-0-100 ~]$ sudo nf-ceph-disk list
INFO: Listing block devices ...
/dev/xvda :
 /dev/xvda1 other, xfs, mounted on /
/dev/xvdb other, unknown
Initializing /dev/xvdb as part of Ceph data store (NB! This command will produce some error/warning messages - which can be safely ignored!):
[centos@ip-172-30-0-100 ~]$ sudo nf-ceph-disk init /dev/xvdb
INFO: Initializing /dev/xvdb ...
WARN: THIS WILL DESTROY ALL DATA ON /dev/xvdb!
Are you sure you wish to continue (yes/no): yes
Creating new GPT entries.
GPT data structures destroyed! You may now partition the disk using fdisk or
other utilities.
The operation has completed successfully.
partx: specified range <1:0> does not make sense
The operation has completed successfully.
partx: /dev/xvdb: error adding partition 2
The operation has completed successfully.
partx: /dev/xvdb: error adding partitions 1-2
meta-data=/dev/xvdb1             isize=2048   agcount=4, agsize=720831 blks
         =                       sectsz=512   attr=2, projid32bit=1
         =                       crc=0        finobt=0
data     =                       bsize=4096   blocks=2883323, imaxpct=25
         =                       sunit=0      swidth=0 blks
naming   =version 2              bsize=4096   ascii-ci=0 ftype=0
log      =internal log           bsize=4096   blocks=2560, version=2
         =                       sectsz=512   sunit=0 blks, lazy-count=1
realtime =none                   extsz=4096   blocks=0, rtextents=0
The operation has completed successfully.
partx: /dev/xvdb: error adding partitions 1-2
INFO: /dev/xvdb initialized!
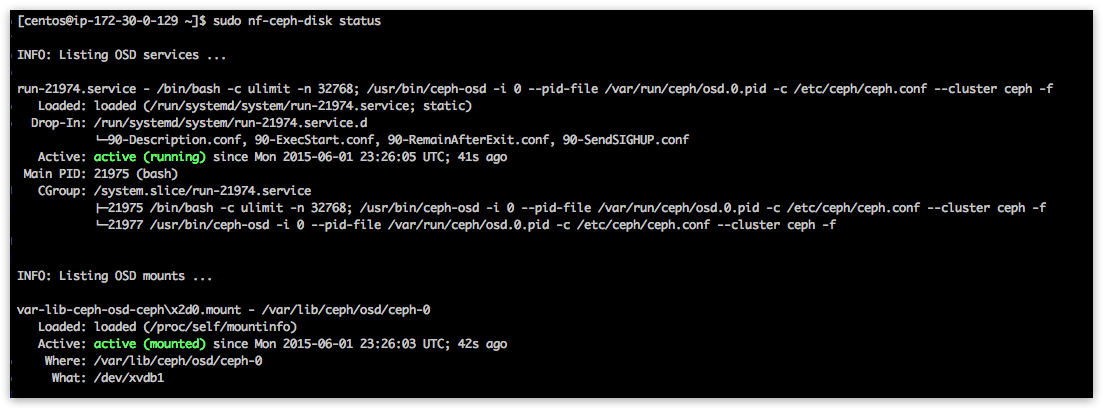
Verifying OSD status:
[centos@ip-172-30-0-100 ~]$ sudo nf-ceph-disk status
This should display OSD service running on host and systemd OSD FS mount being active:
Dashboard should also present 3 initial OSDs as up and running - and all PGs (ie Placement Groups) should be in “active+clean” status:

Initialize CephFS - a POSIX compliant distributed filesystem
Now we can enable and start Ceph Metadata Servers (currently running in single master / standby nodes formation - due Ceph limitated support for active-active MDS atm):
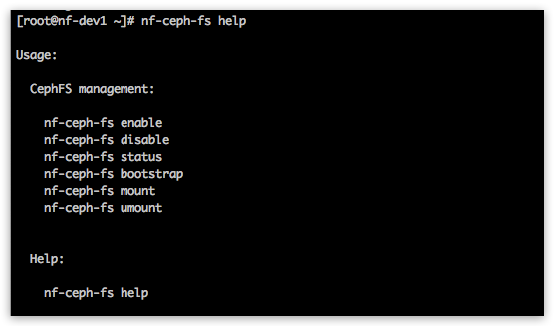
[centos@ip-172-30-0-100 ~]$ sudo nf-ceph-fs enable
nf-ceph-fs enable and nf-ceph-fs bootstrap commands are broadcasted across cluster - so they need to be executed only once on single node!
Ceph MDS service and its nodes should turn green in the nodefabric-dashboard:

CephFS pools need to be created (bootstrapped) - before filesystem can be mounted on nodes:
[centos@ip-172-30-0-100 ~]$ sudo nf-ceph-fs bootstrap
NB! nf-ceph-fs mount and status subcommands do NOT broadcast across cluster!
So CephFS file system needs to be mounted on EACH node (at least once):
[centos@ip-172-30-0-100 ~]$ sudo nf-ceph-fs mount
[centos@ip-172-30-0-100 ~]$ sudo nf-ceph-fs status
